










Function canceled
Function canceled


 Lyngsat
Kingofsat
Dishpointer
DVBSkystar.com
satbeams.com
CS Sat fórrum
Parabola
DVB-Upload
DVB N Forum
dvhk.pl
sat-television
Sat Centrum
SkyStar.org
TV Freak
Technisat
techneteuweb
Jak psat web
Jak na web
Zive.cz
Interval
O webu
Webguru
Builder.cz
Linuxsoft.cz
Tutorials.cz
web.net-mag.cz
Kosek.cz
webtvorba.cz
CSS Creator
samples.cz
programujte.com
builder.cz
časopis.programátor
učebnica c++
Odkiaľ je IP
Uč sa Anglicky
Speedtest
Otestujte sa
Lyngsat
Kingofsat
Dishpointer
DVBSkystar.com
satbeams.com
CS Sat fórrum
Parabola
DVB-Upload
DVB N Forum
dvhk.pl
sat-television
Sat Centrum
SkyStar.org
TV Freak
Technisat
techneteuweb
Jak psat web
Jak na web
Zive.cz
Interval
O webu
Webguru
Builder.cz
Linuxsoft.cz
Tutorials.cz
web.net-mag.cz
Kosek.cz
webtvorba.cz
CSS Creator
samples.cz
programujte.com
builder.cz
časopis.programátor
učebnica c++
Odkiaľ je IP
Uč sa Anglicky
Speedtest
Otestujte sa

How to use vPlug
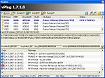
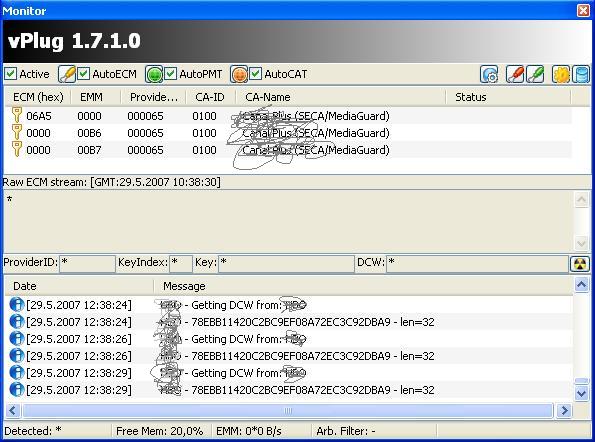
The first public version of vPlug was released by Vahid (the author of the plugin) on 17.12.2004. At that time the plugin supported Viaccess1, TPSCrypt‑1, TPSCrypt‑2.1. A week later version 0.2 was released, which could already decode the BISS system. The author gradually added and fixed supported systems, and today the plugin can decode several systems, supports key sharing through a web interface, updates transponders, has a built‑in key editor, automatically finds and updates keys for some providers, and more. At the time of writing this guide, the latest released version is 1.7.1.1, whose screenshot you can see in the image.
How to work with the plugin easily. Most of you probably already know what vPlug is; if not, then briefly: it is a plugin that can emulate certain decoding cards and CI modules. Of course, besides vPlug.dll, additional files are required. The readme.txt describes which files are needed, how vPlug is implemented into the player, in which players it was tested, and the entire history of vPlug. Starting from version 1.3.7, vPlug underwent certain changes. Most ini files and softcam files were moved or replaced by binary databases. Everything is described in readme.txt, which is included with every new version of vPlug.

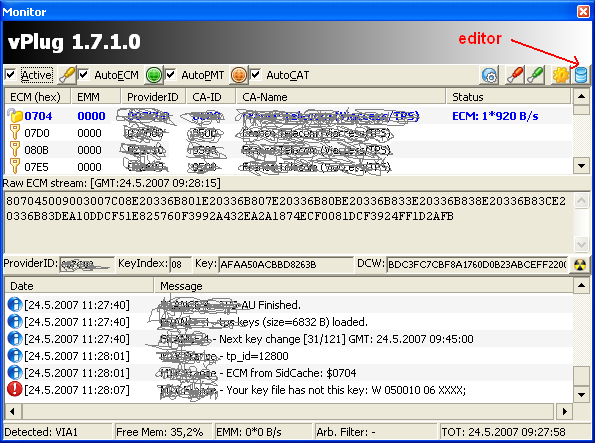
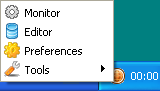
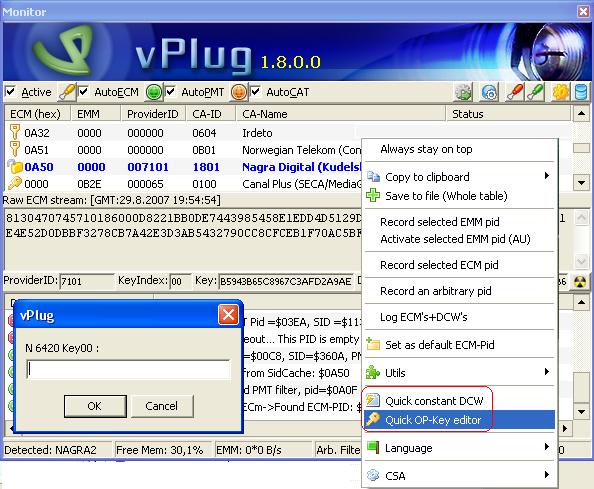
I assume all of you already have some DVB player running with vPlug. If so, then in the icon tray (next to the clock in the bottom bar, a yellow circle) you should also see the vPlug icon. Either right‑click it and select Monitor, or left‑click it normally to open the main Monitor window. In the upper left part are clickable boxes where you can enable/disable vPlug and also activate or deactivate other items. On the right are icons for opening the editor, preferences, etc. The next part of the window (where ECM, EMM, etc. are displayed) shows which systems the provider uses for encryption. You can also notice the Provider ID field — later you can use it to find the key in the database for editing. And the last third of the window is the log, which can be saved to a file or sent to the author in case of inconsistencies. (Sorry for being brief, but I cannot write too long due to lack of time.)

Another very important menu item is the editor.
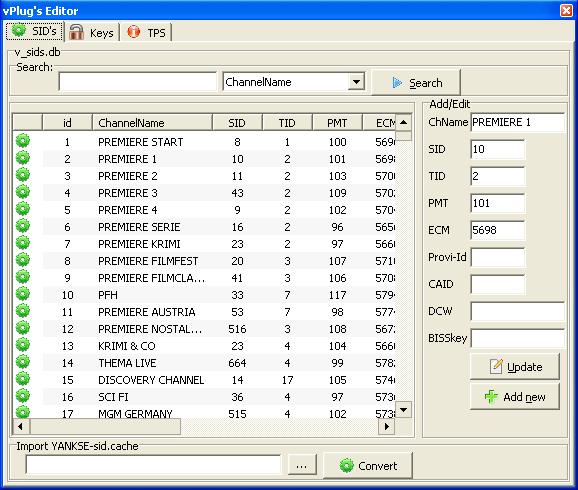
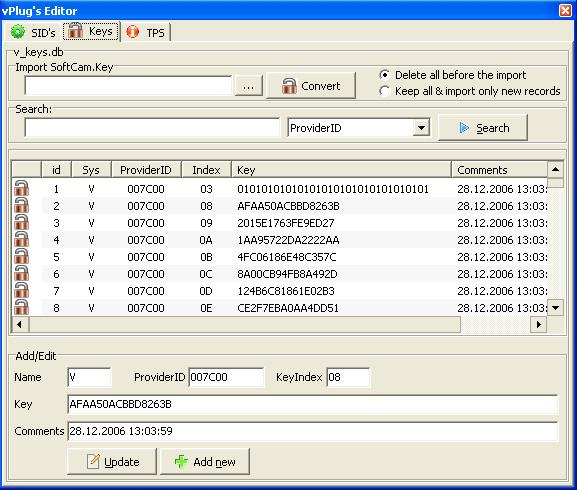
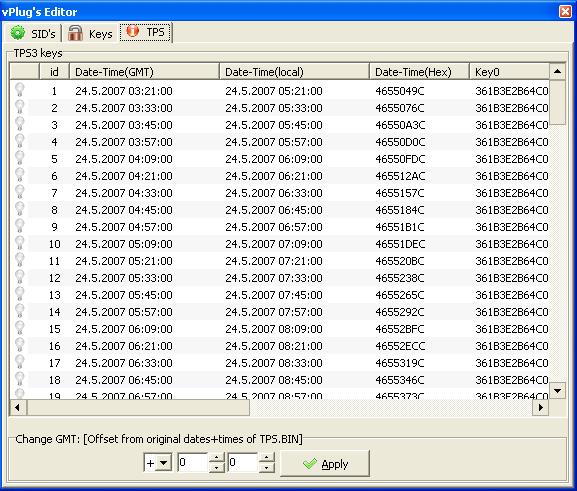
There are three tabs: SID’s, Keys, and TPS.
The SID’s tab is mainly used for entering v_dcw and BISS keys.
How to enter a DCW key?
First, find out whether the channel currently uses DCW mode.
(DCW means that the incoming signal is encrypted but constant — the DCW does not change.)
If you are 100% sure (you can check it on the card to see if it changes, but usually someone posts
it online), you can proceed to entering the key into the database.
--------------------------------------------------------------------------------
- Tune the desired channel in your DVB player.
- In the search field, type the name of the desired channel. Click search — the channel should appear in the window. If not, it is not in the database and you must proceed to the next step.
- Right‑click inside the window and select “find current channel”. Now the channel should definitely appear. (If you use step 3, you can skip step 2.)
- On the right side find the DCW field and paste the DCW key (32‑digit hex). Use the same procedure for BISS keys.
- Finally click update and close the vPlug window.

The second tab in the editor is Keys. This is basically the former softcam.key. There is also an option to import a softcam. Click the three dots “...”, find softcam.key on your disk, click Convert, then Update, and done. But how to insert just one key? Very simple. For example, if I want to change a key for a provider using Nagra: Type “N” into search and search by name, or if you know the provider ID, type the ID and search by that. There are several options. When you find the correct row, at the bottom there is a field labeled “key”. Simply replace it with the new one and click update.
-----------------------------------------
Edit: 20.08.2007
Another way to add a key (either classic or DCW) is as follows: You must have the desired channel tuned. In the main vPlug window, right‑click in the part where the provider (encryption system…) is shown. A menu appears — click either Quick constant DCW or QUICK OP‑Key editor (depending on what you want to insert). Then simply paste the key, click OK, and done. This feature greatly simplified key insertion through the editor.

The third tab is TPS.bin. Currently (at the time of writing), automatic key update (AU) works for the TPS provider. In the past it was necessary to download TPS.bin every day; today vPlug uses v_tps.db. Sometimes the provider makes a change, but Vahid usually fixes it within a few hours. Follow updates on this site — I usually publish new vPlug releases there.

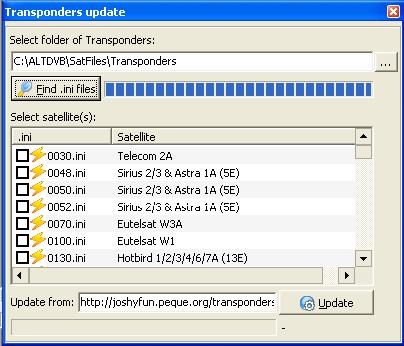
Another icon in the monitor window is TP update (blue circle with a gear). This means updating transponders. “Select folder of transponders” — choose where your transponder files are stored. Then click find ini files — all TP files will appear in the window. Check the ones you want to update and click connect & update. There is also an option to specify the source URL — if you know another TP URL, enter it there.
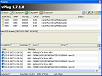
Now we get to channel sharing — the so‑called CardClient.
In this case it is mainly DCW sharing.
Although vPlug should also support RADEGAST and CAMD3, I have not tested them personally.
If you decide to share a channel, find the file v_dcw_sharing.ini in the vPlug directory, open it for
editing, and enter the required parameters, something like:
[Exact channel name]
site_url=http://exact server address
regular_exp_pattern_to_find_key=(?s)<br>(.+?)</body>
key_part1_exp=
key_part2_exp=
Of course, sharing works only when connected to the internet.
If the server is running, it sends DCW1 and DCW2 to the specified URL, vPlug retrieves them and
decodes the channel.
It is similar to WinCSC, but here only the channels listed in v_dcw_sharing.ini are decoded.
Naturally, you can list multiple channels.
Unfortunately, there are not many such servers publicly available, but some can be found with a bit
of searching.

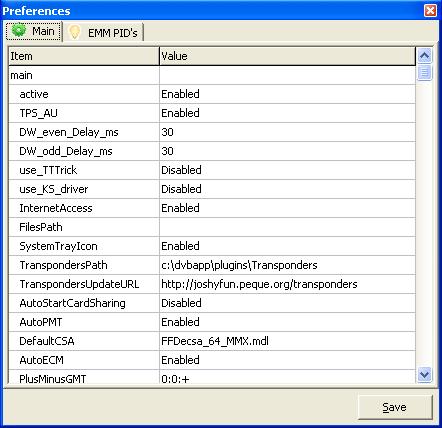
Finally, we reach the last item — “Preferences”. Here you can configure parameters for vPlug, such as enabling/disabling vPlug, enabling/disabling autoECM, etc. All of this can also be configured in the vplug.ini file in the vPlug directory. That should be everything. I described only the most interesting items; since vPlug is frequently updated, some details may change.