










Function canceled
Function canceled


 Lyngsat
Kingofsat
Dishpointer
DVBSkystar.com
satbeams.com
CS Sat fórrum
Parabola
DVB-Upload
DVB N Forum
dvhk.pl
sat-television
Sat Centrum
SkyStar.org
TV Freak
Technisat
techneteuweb
Jak psat web
Jak na web
Zive.cz
Interval
O webu
Webguru
Builder.cz
Linuxsoft.cz
Tutorials.cz
web.net-mag.cz
Kosek.cz
webtvorba.cz
CSS Creator
samples.cz
programujte.com
builder.cz
časopis.programátor
učebnica c++
Odkiaľ je IP
Uč sa Anglicky
Speedtest
Otestujte sa
Lyngsat
Kingofsat
Dishpointer
DVBSkystar.com
satbeams.com
CS Sat fórrum
Parabola
DVB-Upload
DVB N Forum
dvhk.pl
sat-television
Sat Centrum
SkyStar.org
TV Freak
Technisat
techneteuweb
Jak psat web
Jak na web
Zive.cz
Interval
O webu
Webguru
Builder.cz
Linuxsoft.cz
Tutorials.cz
web.net-mag.cz
Kosek.cz
webtvorba.cz
CSS Creator
samples.cz
programujte.com
builder.cz
časopis.programátor
učebnica c++
Odkiaľ je IP
Uč sa Anglicky
Speedtest
Otestujte sa

Basic installation of ProgDVB
ProgDVB is software used for watching digital: S – satellite, T – terrestrial, C – cable television and radio. It is user‑friendly and has many features. The latest versions somehow became worse. Before it, there were only original Technisat TV4 PC programs. Shortly after, Hackbart created software called DVB Viewer (the first program in which video and audio could be recorded). Then Win STB appeared, which was the first program that allowed offline decoding…

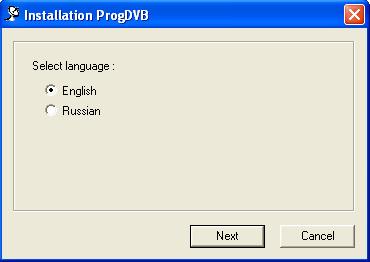
After clicking the installation file, we see this window. There are only two languages to choose from, but after installation you can add more, including Slovak. The file has the extension *.lng* and is placed in the ProgDVB root directory.

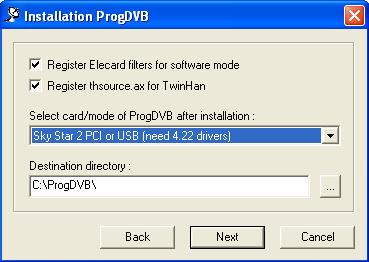
In this window we leave filter registration checked and select our card, i.e. SkyStar 2, and the path where the program should be installed, usually C:/ProgDVB. Click Next.

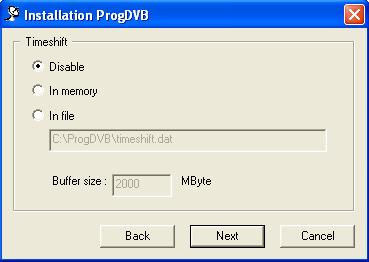
I leave TimeShift turned off, but if you want, you can enable it and set the buffer size in megabytes either to a file or to memory.

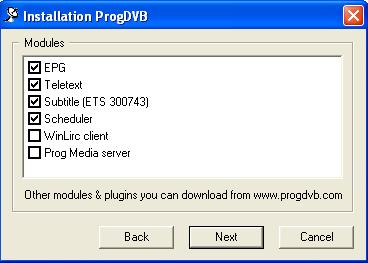
This window shows the modules already built into the program. The first four are already checked: EPG – TV guide, Teletext and subtitles (if the station broadcasts subtitles, you can use them). The last two can also be checked if you have a remote control, and “ProgMedia Server” is used for streaming video over the network.

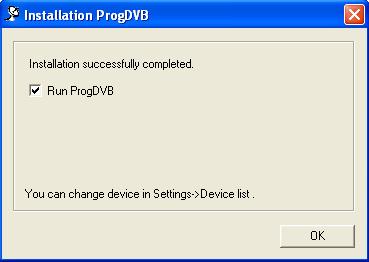
This window shows that the installation was successful. Leave “Run ProgDVB” checked and click OK. The program will start and we can continue with further configuration.
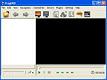
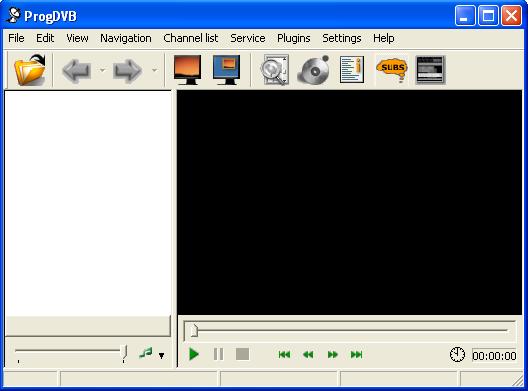
So ProgDVB has successfully started after installation. Problems may occur if we forget to select our SkyStar2 card during installation (see image no. 2). In that case ProgDVB would report that it cannot find the device or our card (this happened to me too :)

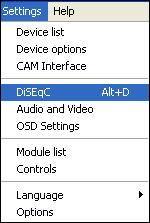
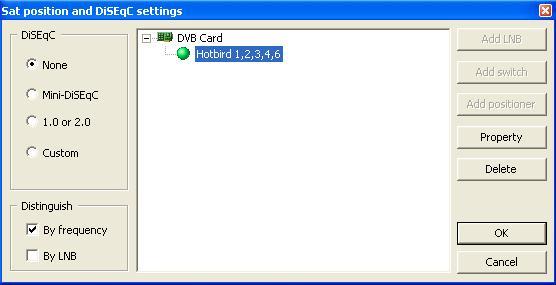
We continue. In the top menu click Settings and then select DiSEqC (or press the hotkey “Alt+D”). A window for DiSEqC and satellite configuration will immediately open. I won’t go into DiSEqC much because I use only one LNB.

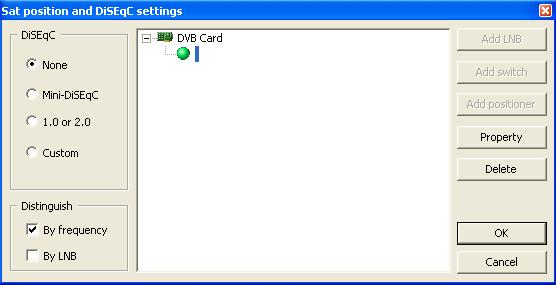
Since I mentioned that I don’t use DiSEqC, I leave “none” and click the green dot under DVB Card. In the right menu the Property button becomes available — click it.

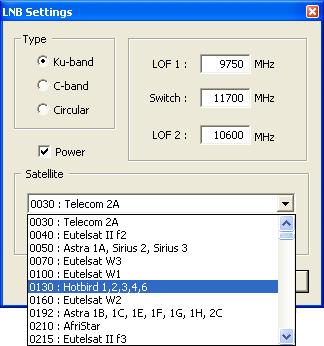
A window called LNB Settings opens, where we leave everything as it is (if we want to tune in the KU band, which we probably do). LOF 1/2 and Switch remain unchanged. Now we only need to select the satellite we want to scan from the list and confirm with OK.

Now that we have selected the satellite, click the OK button.

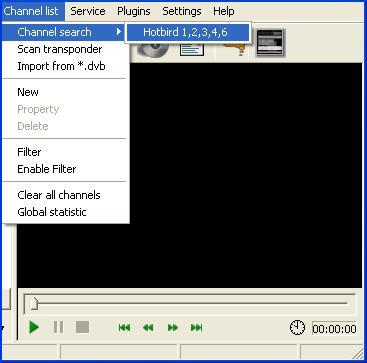
Next, in the top menu of the program, select Channel List → Channel Search → Hot Bird 1,2,3,4,6 (5 is, I think, analog, but I’m not sure) and start scanning the selected satellite.

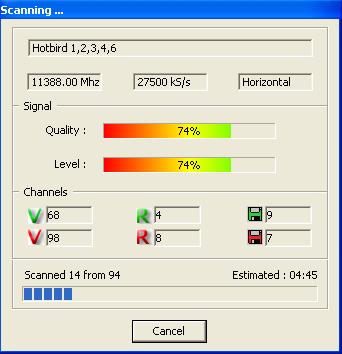
This is roughly how the scanning process looks. It should take about 4–6 minutes. This time depends on the number of transponders — Hot Bird has about 95 transponders.

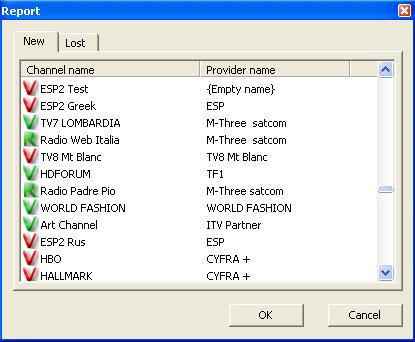
And this is how it looks after scanning the satellite. Green channels are free and red ones are encrypted. Click OK.
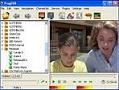
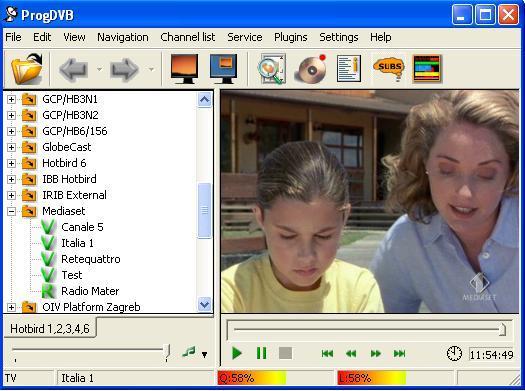
The installation is successfully completed and now all that remains is to choose a channel and watch. Channels can be sorted by transponder, name, or provider.
Official website: www.progdvb.com